Prerequisite
Before setting up a campus-owned masked Campus Solutions environment, ensure you've submitted either a temporary or annual request.
- Job Aid: Temporary Connectivity Request
- Job Aid: Annual Connectivity Request
Configure Campus Masked CS Environment
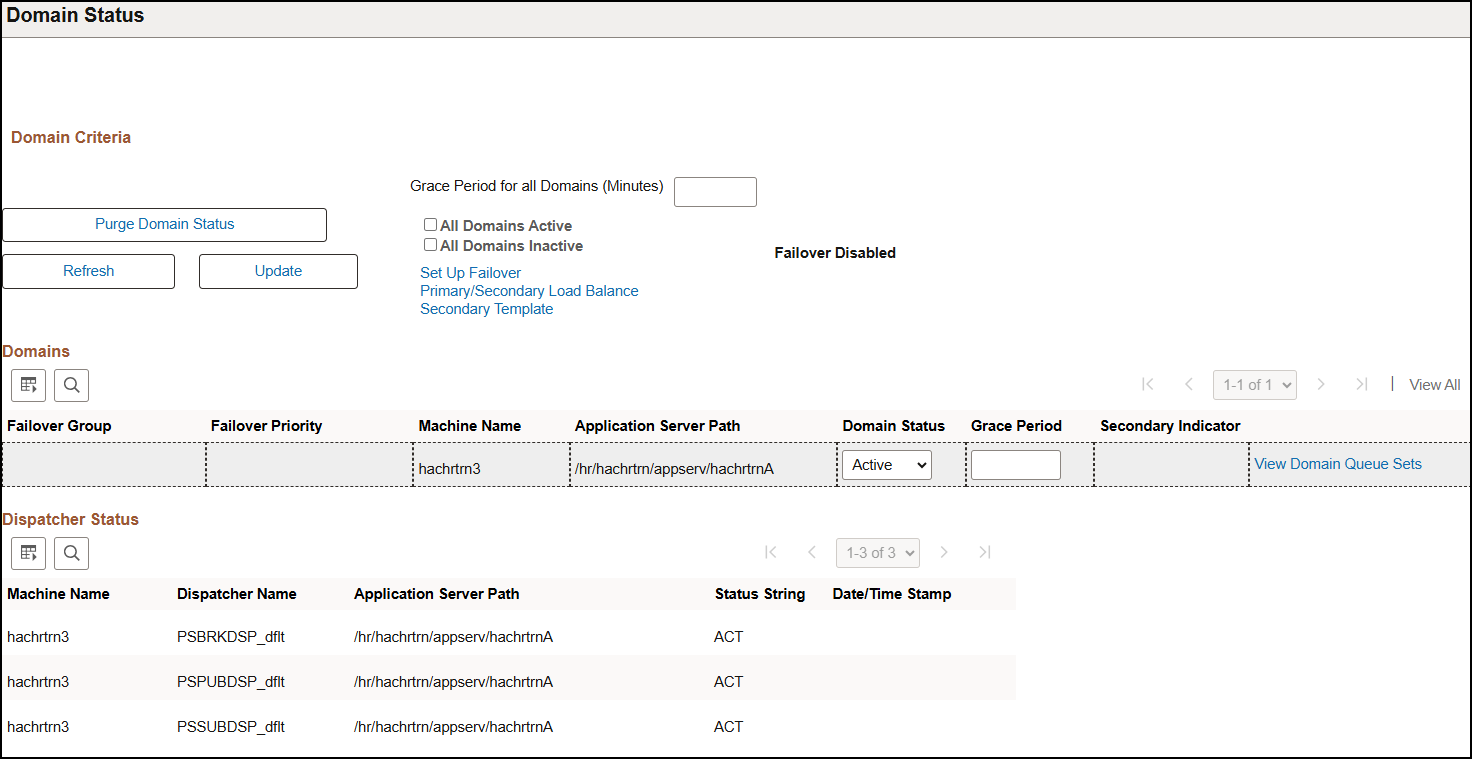
Step 1: Navigate to the Domain Status
- Navigation: Menu > PeopleTools > Integration Broker > Service Operations Monitor > Administration > Domain Status
Step 2: Confirm the Domain Status is active
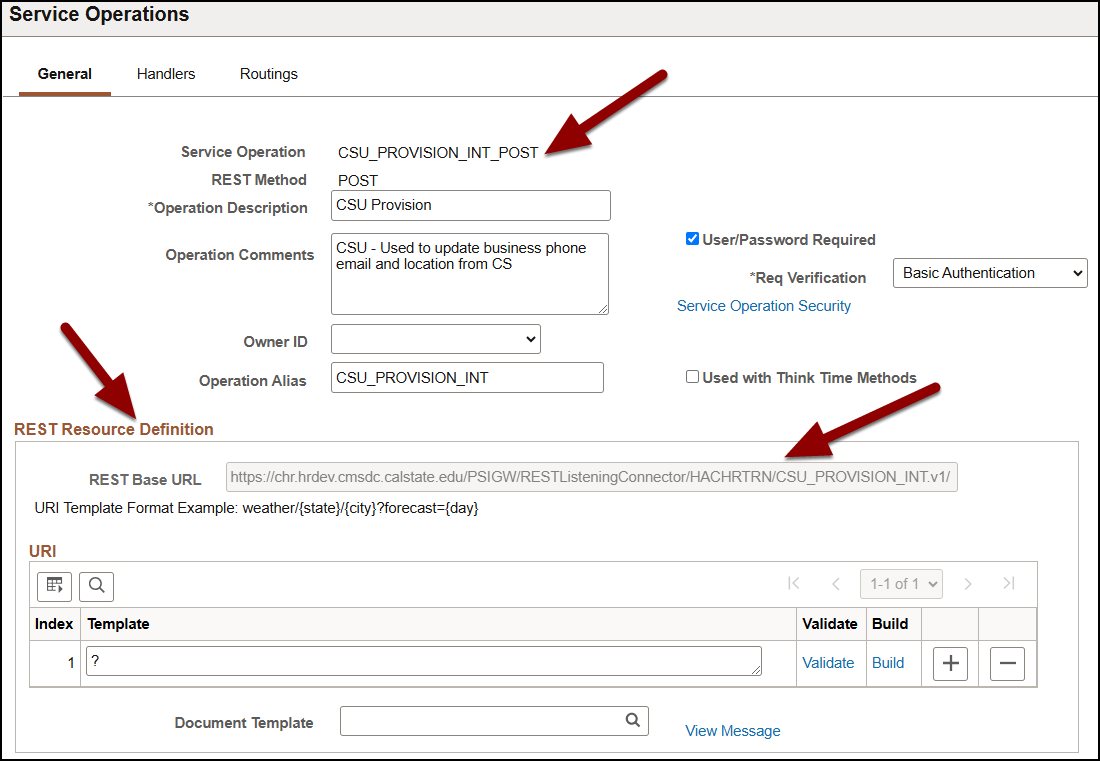
Step 3: Navigate to the Service Operations page
- Navigation: Menu > PeopleTools > Integration Broker > Integration Setup > Service Operations > General page
Step 4: Confirm that the following Service Operations are active, have the correct URL prefixes, and reference the appropriate CHRS database in the URL.
- CSU_SEC_USERID
- CSU_PROVISION_INT
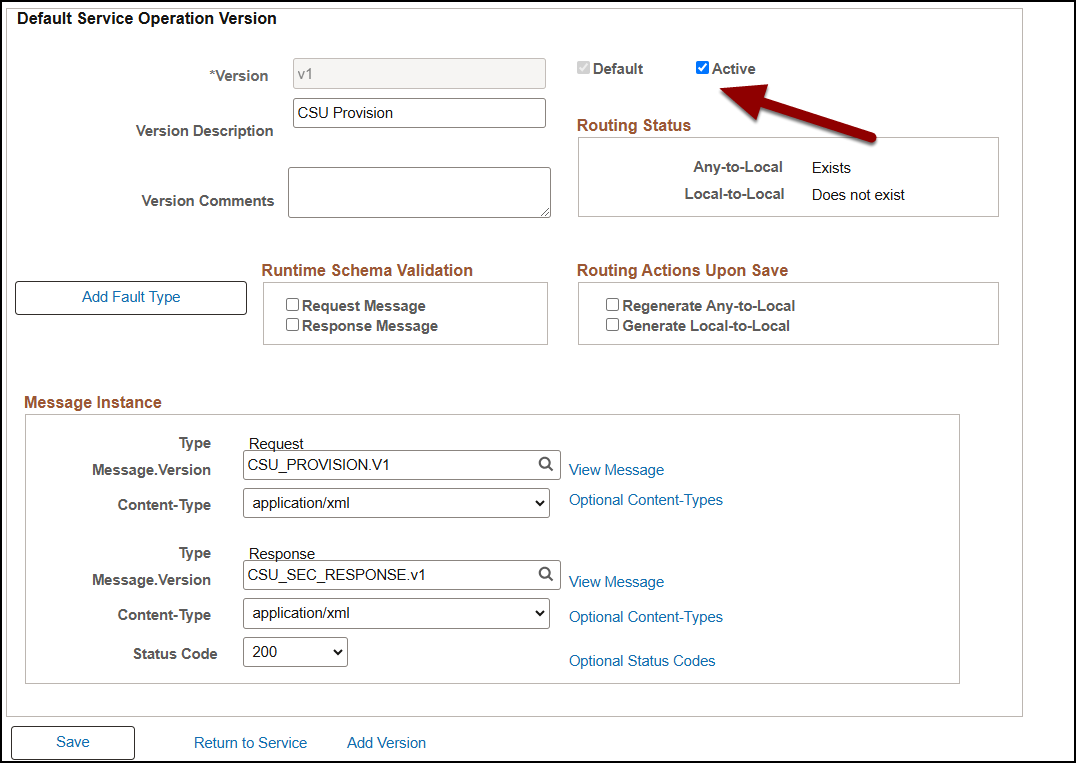
Step 5: Confirm that this Service Operations is active.
CSU_CHRS_CS_INTEGRATION_POST
Step 4: Confirm the following Service Operations are inactive as they are related to PDM functionality in CS
- CSU_MDH_POST
- CSU_MDH_Local
Step 7: Establish and verify the database link from Campus Solutions (CS) to CHRS.
exec
system.csu_dblinks.build_hrxcs('hachr***');Step 8: Refresh the Crosswalk table using the CHRS XRef Refresh process
Job Aid: CHRS XRef Refresh in CS
Step 9: Complete Campus Integration Validation Checklist (Without CHRS App Dev Resource and CMS-CFS) to confirm integration is setup correctly between CS and CHRS.
End of Article